
A CRANKY old hot rodder once said to me: “What do I want to wear a seatbelt for? If I was planning to have a crash, I wouldn’t go for a drive!” Sound logic indeed but not an opinion I’ve ever taken on board.
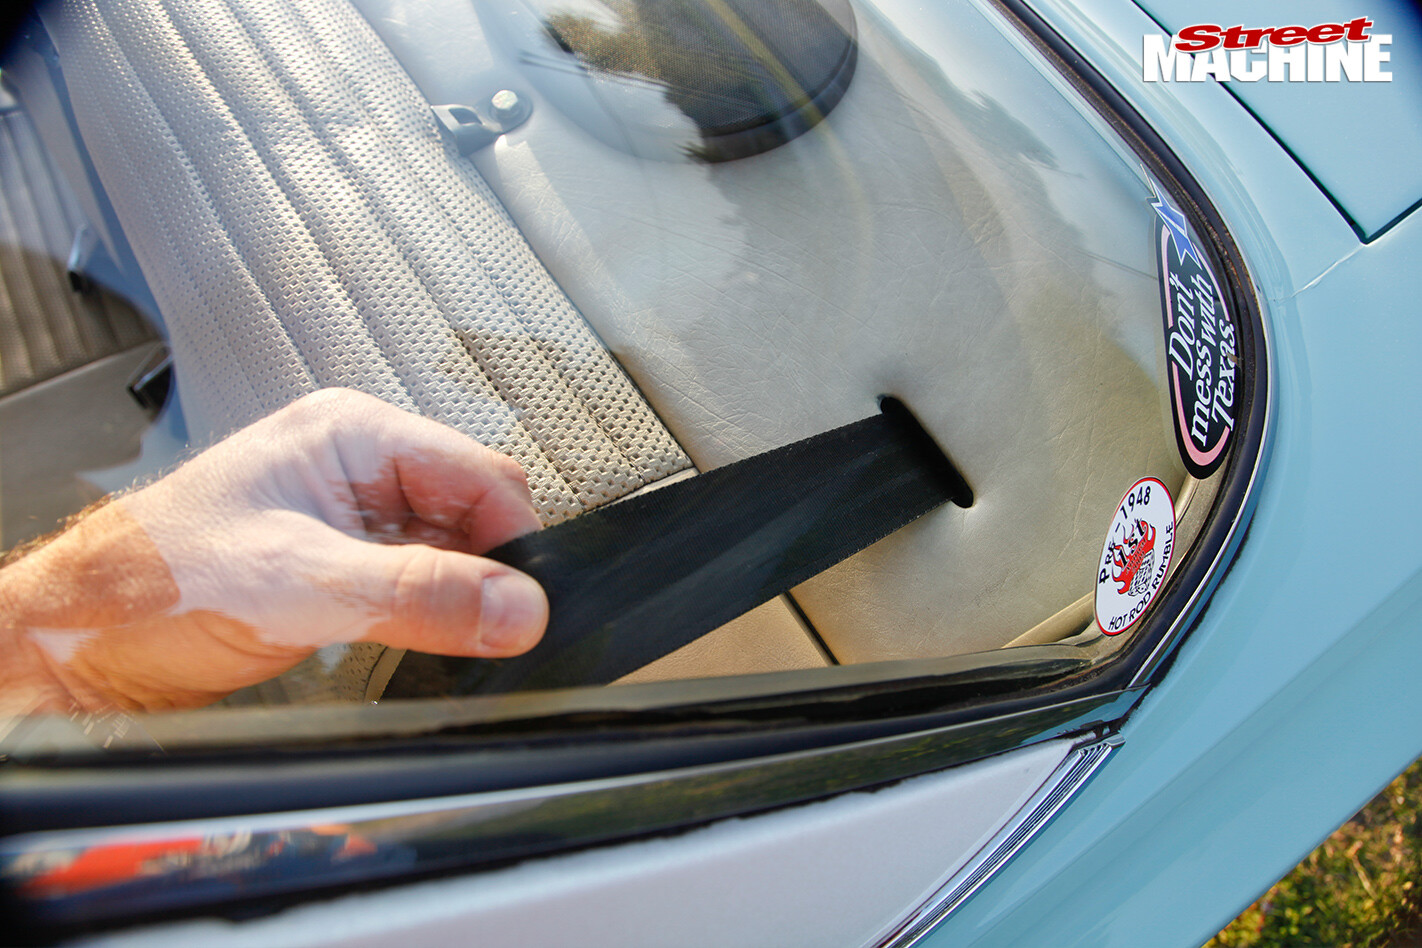
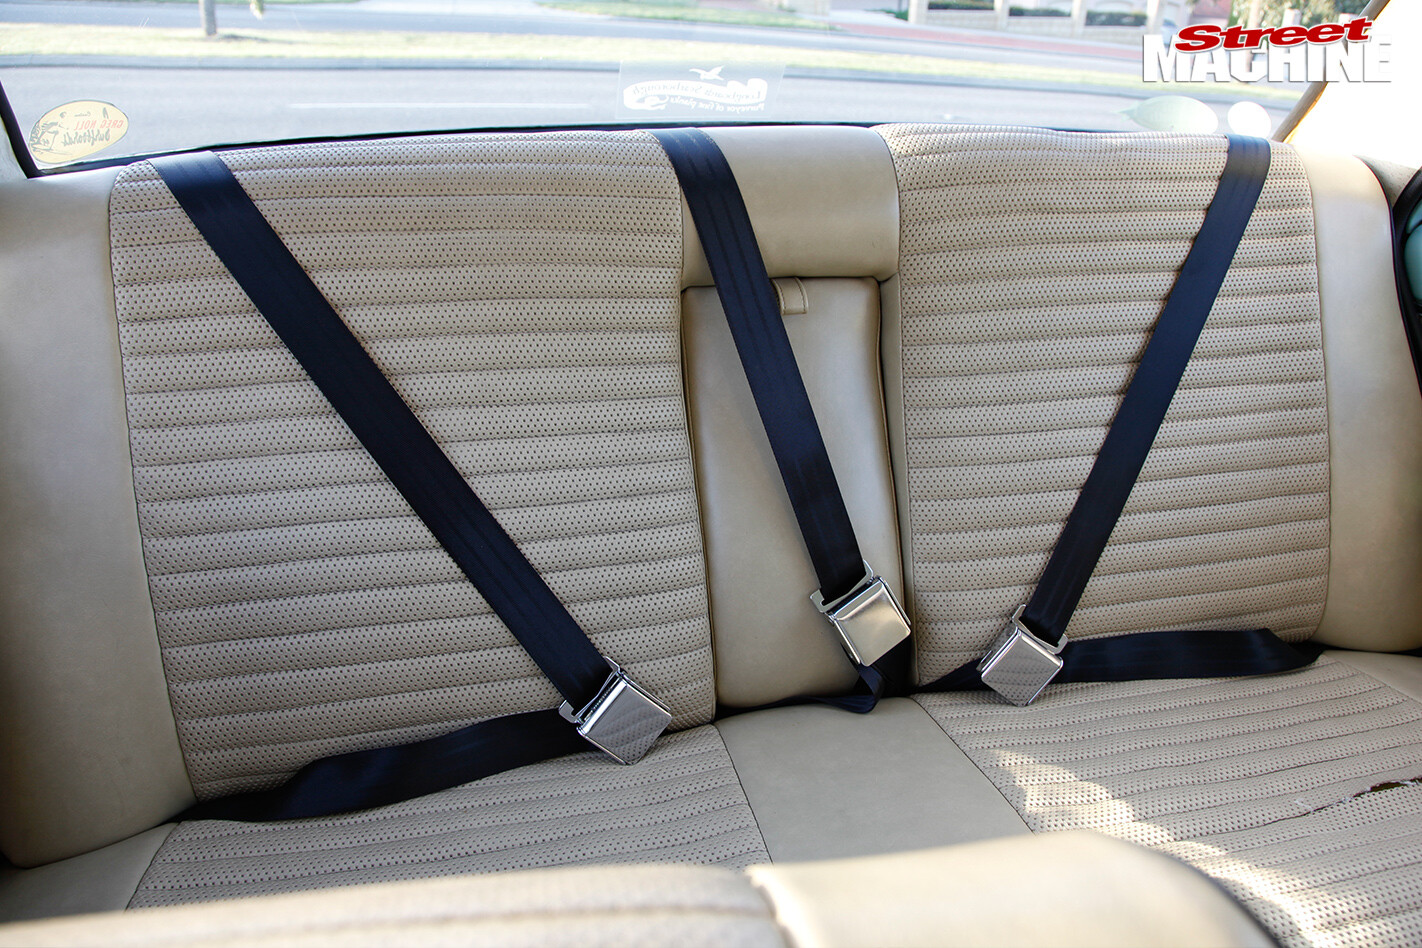
As part of the ongoing refinement of my 1967 Rambler American, I decided to replace the rear lap belts with three new retractable inertia reel lap/sash versions, along with three child restraint anchors while we were at it.
To figure out the best way to approach this, I had a good talk with Paul from Charisma Custom. He suggested that of the two common styles — under mount and surface mount — it would look a lot neater if I went with the type that mounted underneath the parcel shelf.
To get the job underway I paid a visit to Graham Martin and his team at Seatbelt Solutions, who supply, fit and manufacture seatbelts for all manner of vehicles. I told them what we wanted to do and they supplied everything that Charisma and I would need to complete the installation.
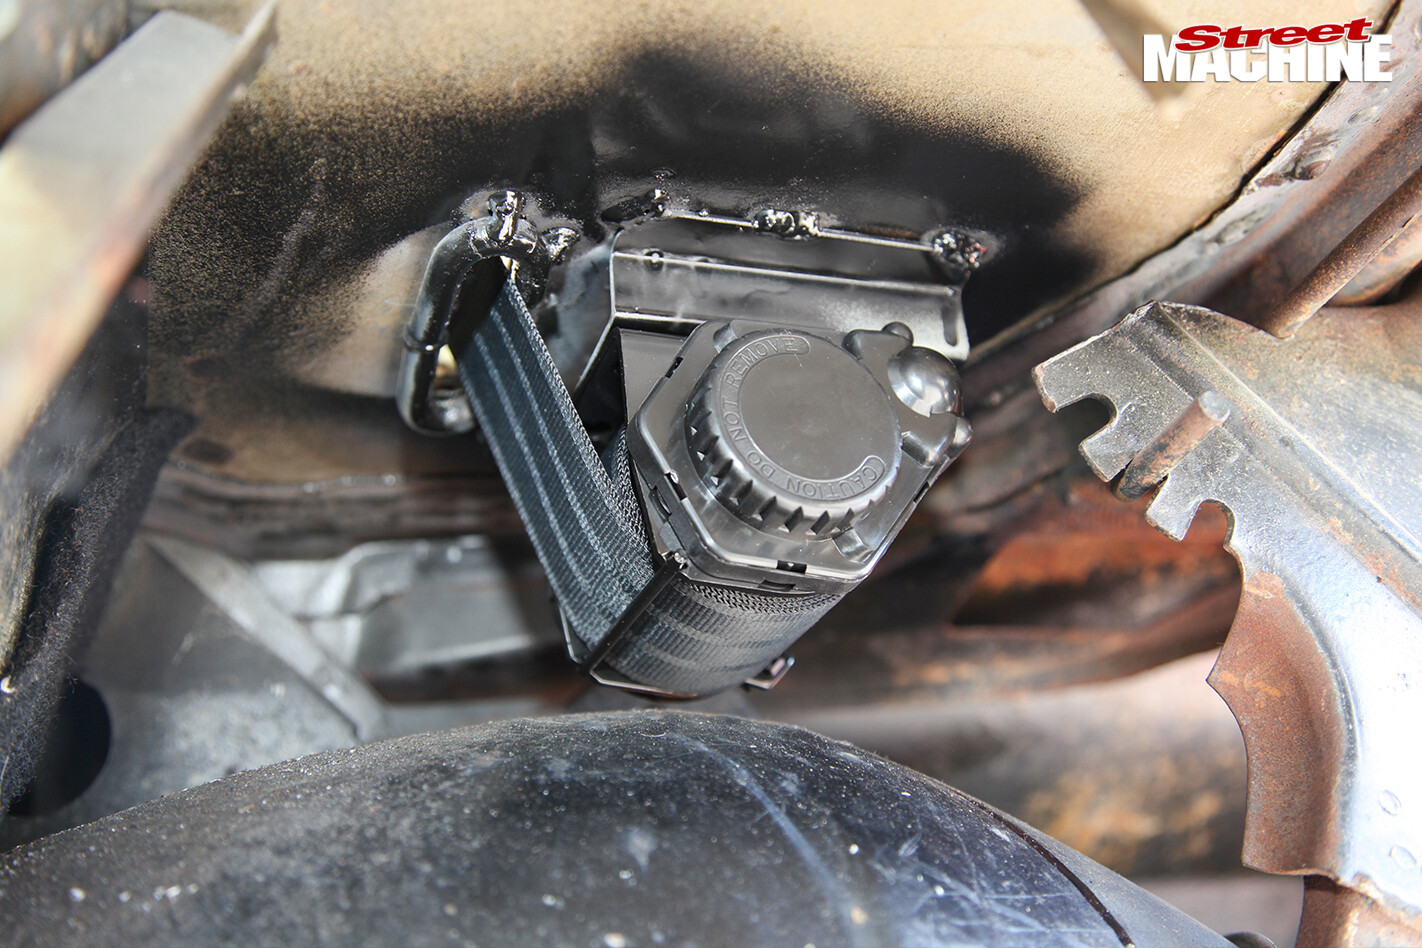
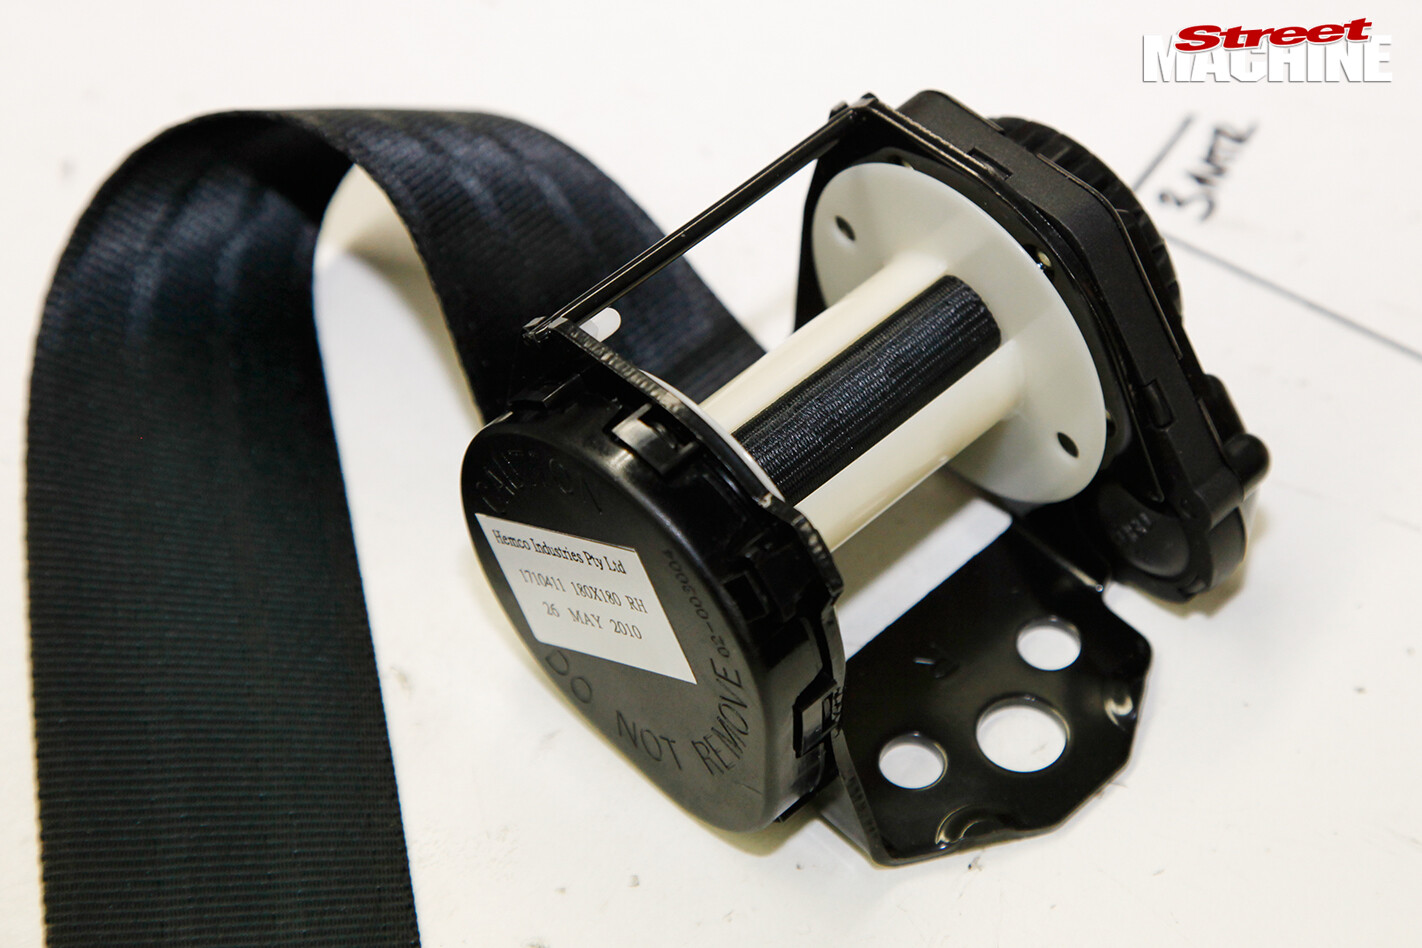 STEP 1. These are the retractable inertia reel assemblies that will be installed under the Rambler’s parcel tray. They are a universal-fit Emergency Locking Retractable (ELR) design that’s available in three different mounting configurations: vertical, top-mount and underhung. The units look very similar but there are slight differences in their locking mechanisms to suit the different mounting orientations.
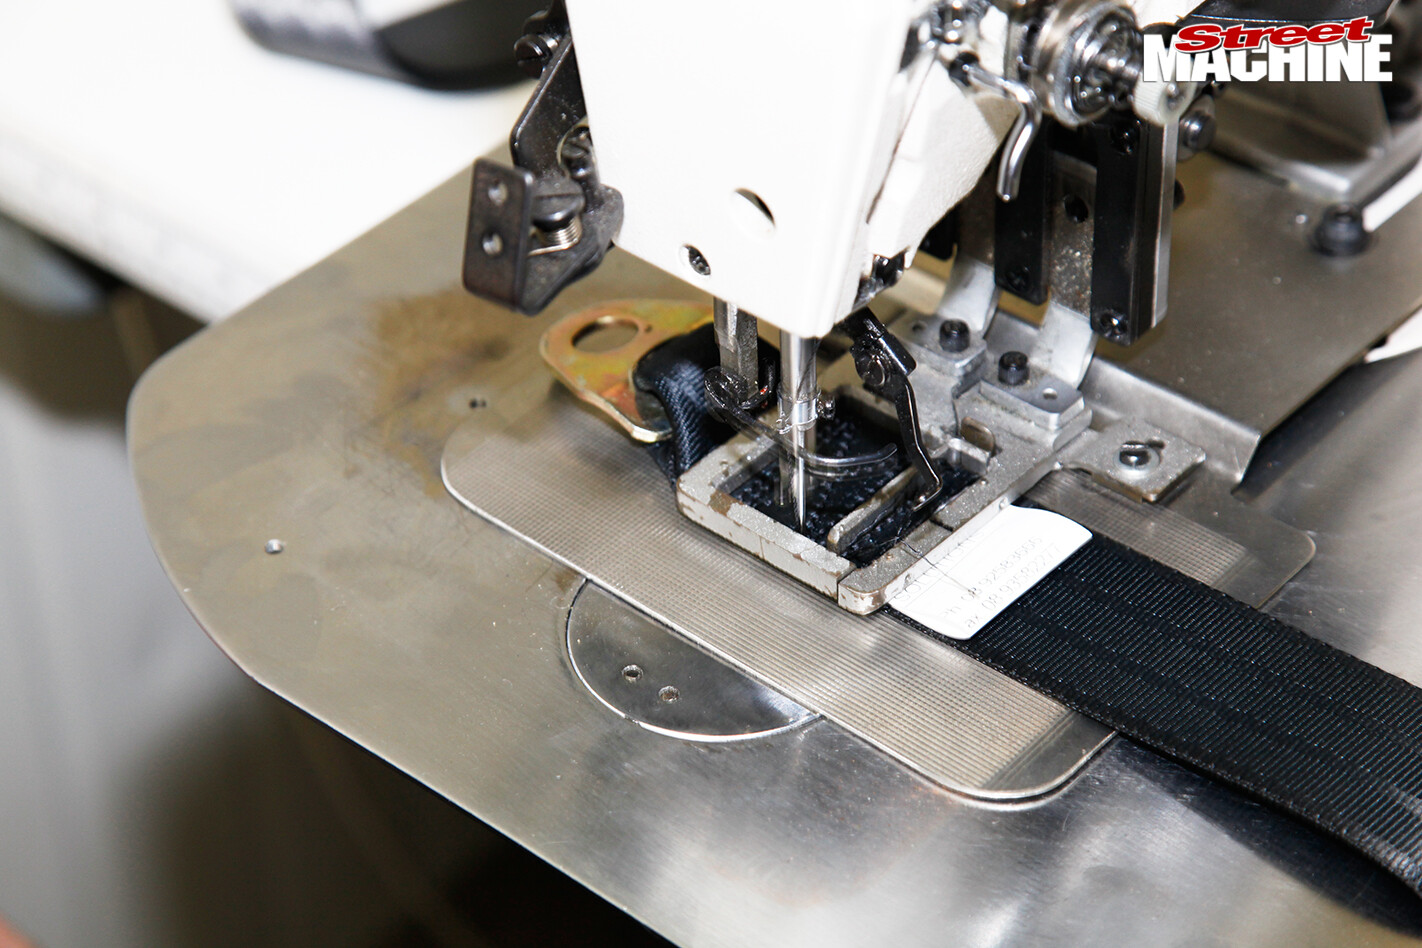 STEP 2. The buckles and end-mount tabs are affixed to the webbing via stitching that can only be done by a certified machine and machine operator. The fully automated machine does the specialised routine in only seven seconds.
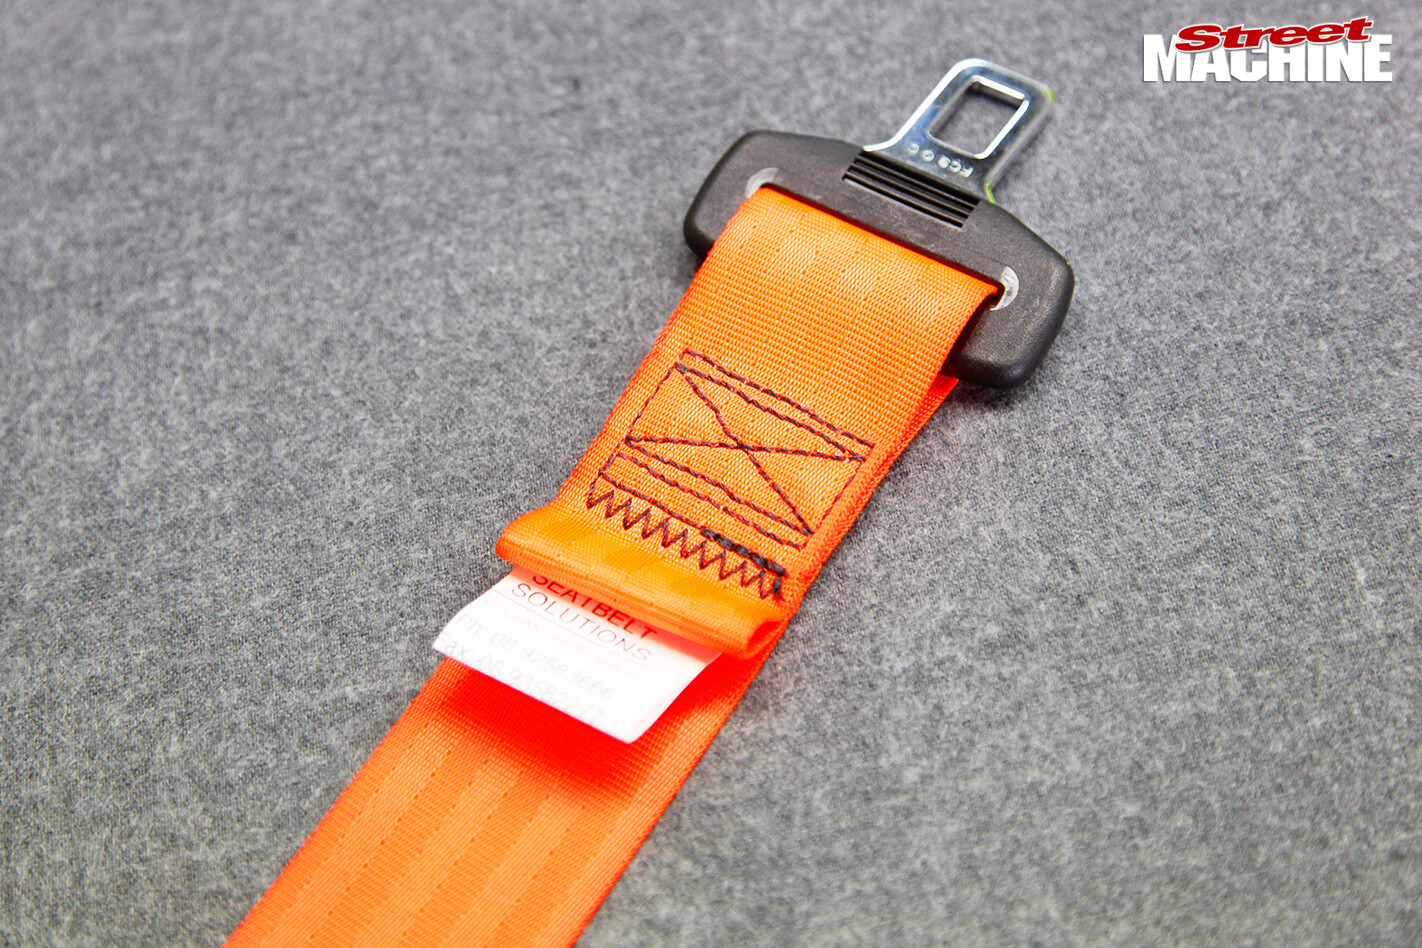 In a tensile strength test, the webbing broke before the stitching let go! The all-important white tag (above) shows the belt meets the relevant Australian and NZ standards, plus date of manufacture.
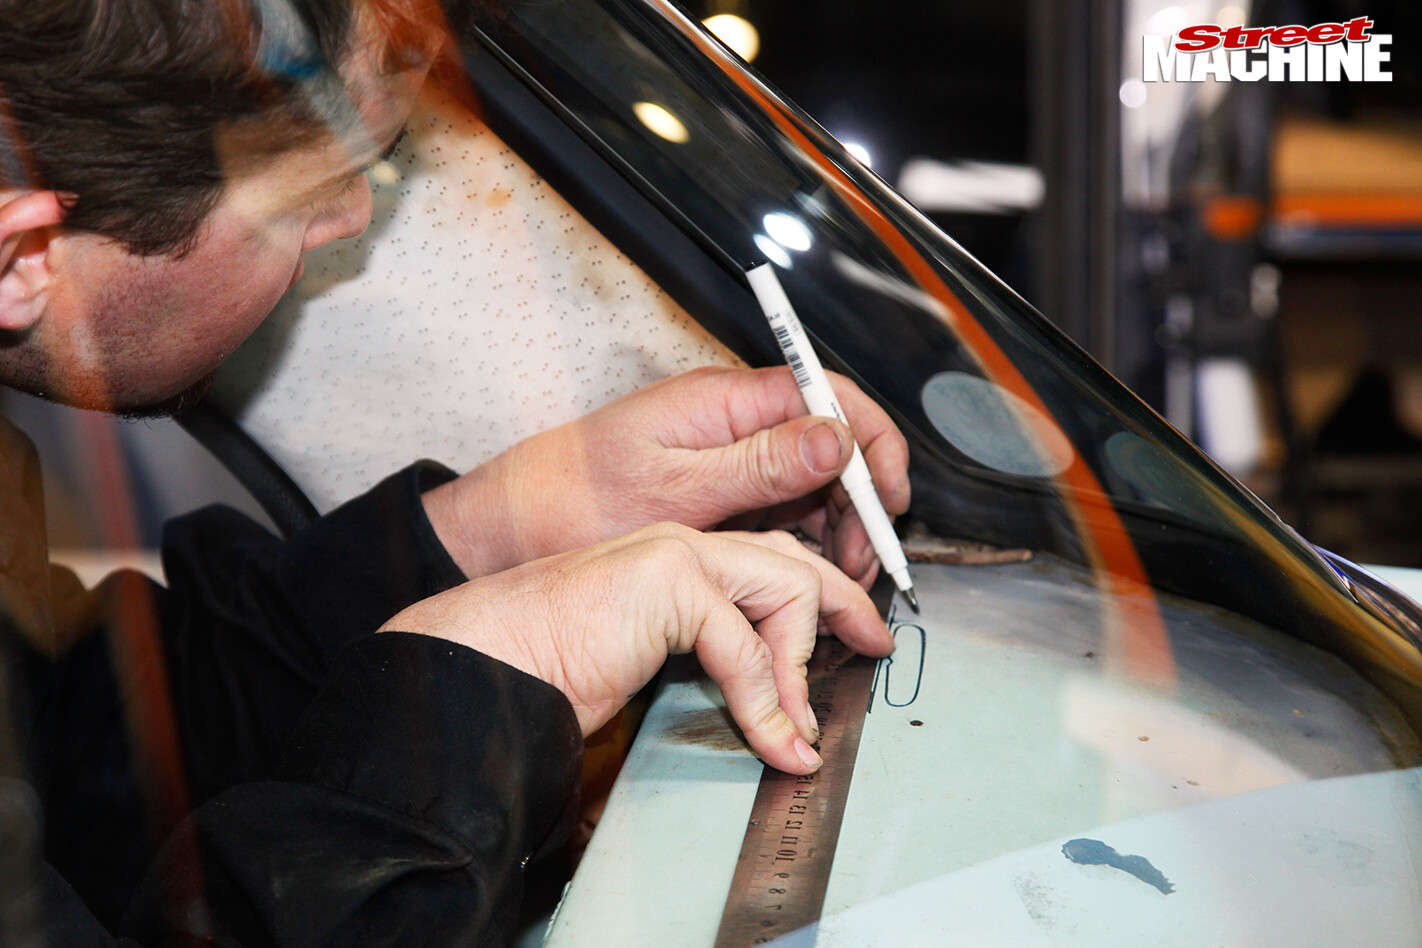 STEP 3. As with any modification, measure everything several times if you want it all to work properly. When determining where to position the mechanism, you need to verify there is enough room to mount the reel while ensuring the belt emerges at a point where it will sit comfortably on the passenger’s shoulder and minimise the risk of it slipping off in an accident, so don’t mount it too far inwards or outwards.
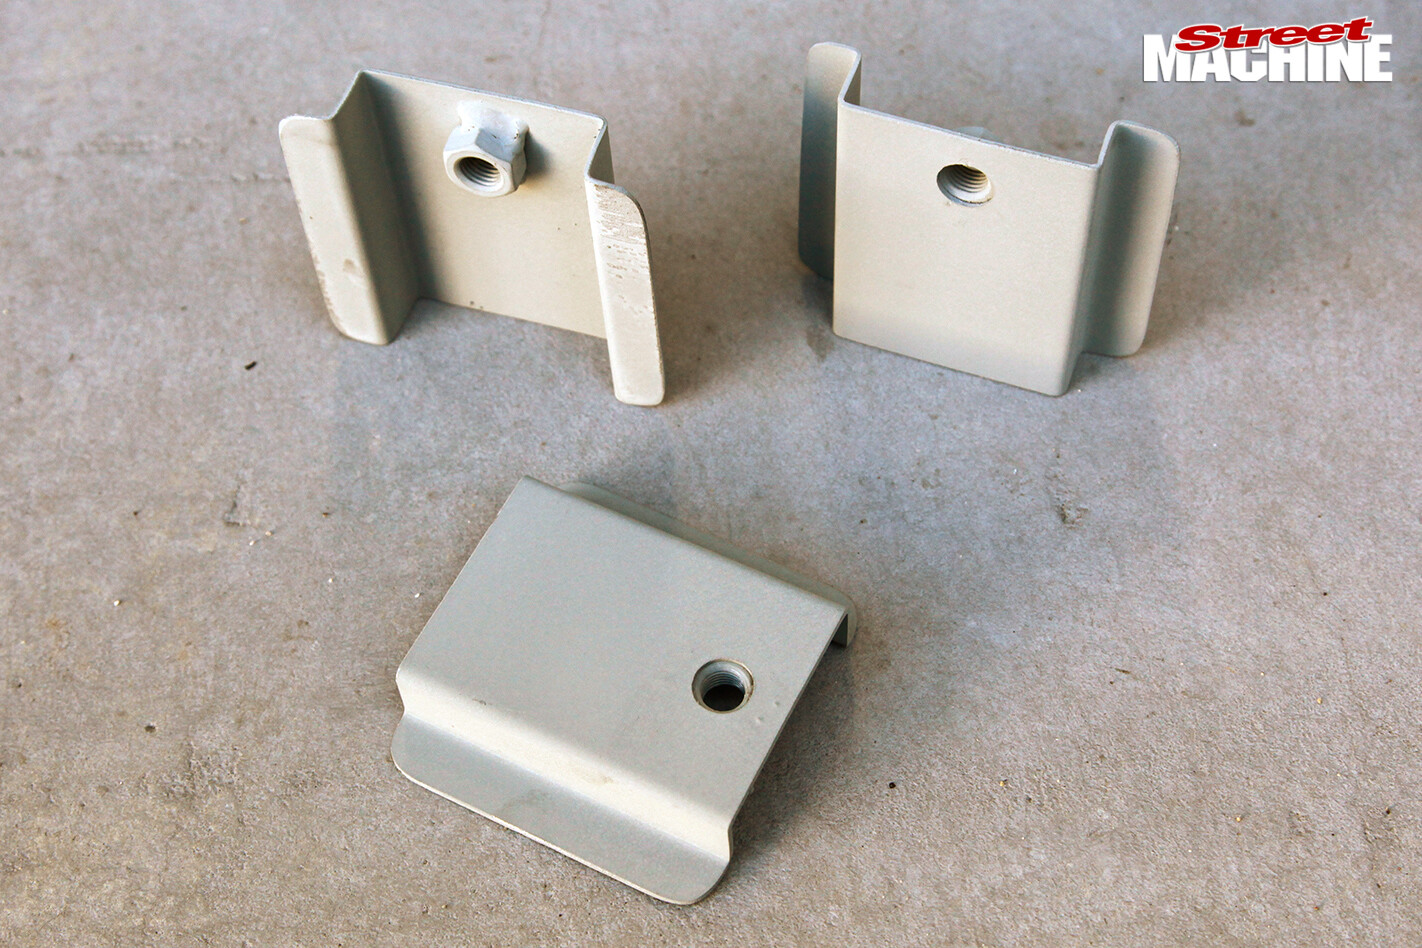 STEP 4. Charisma fabricated these top-hat mounts to which the reels will be bolted. The stepped design accommodates the captive nut and gives the webbing a better angle to run through the slot in the parcel shelf.
 It’s critical the belt doesn’t rub on any sharp edges as frayed belts are dangerous and a roadworthy failure in the making. Welding in guide rings gives the belts a smooth, solid surface to run over.
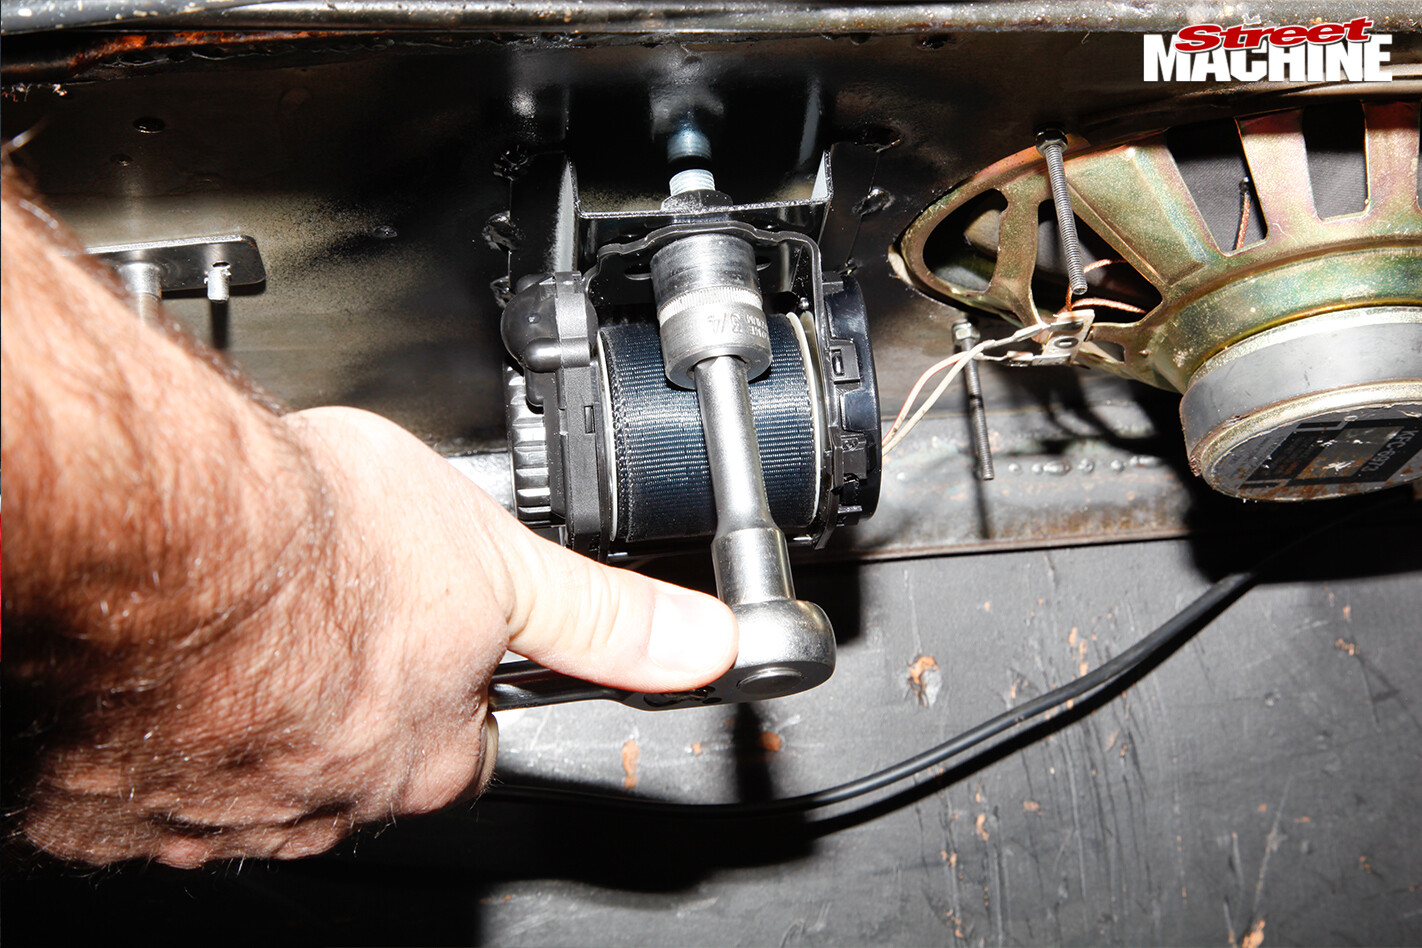
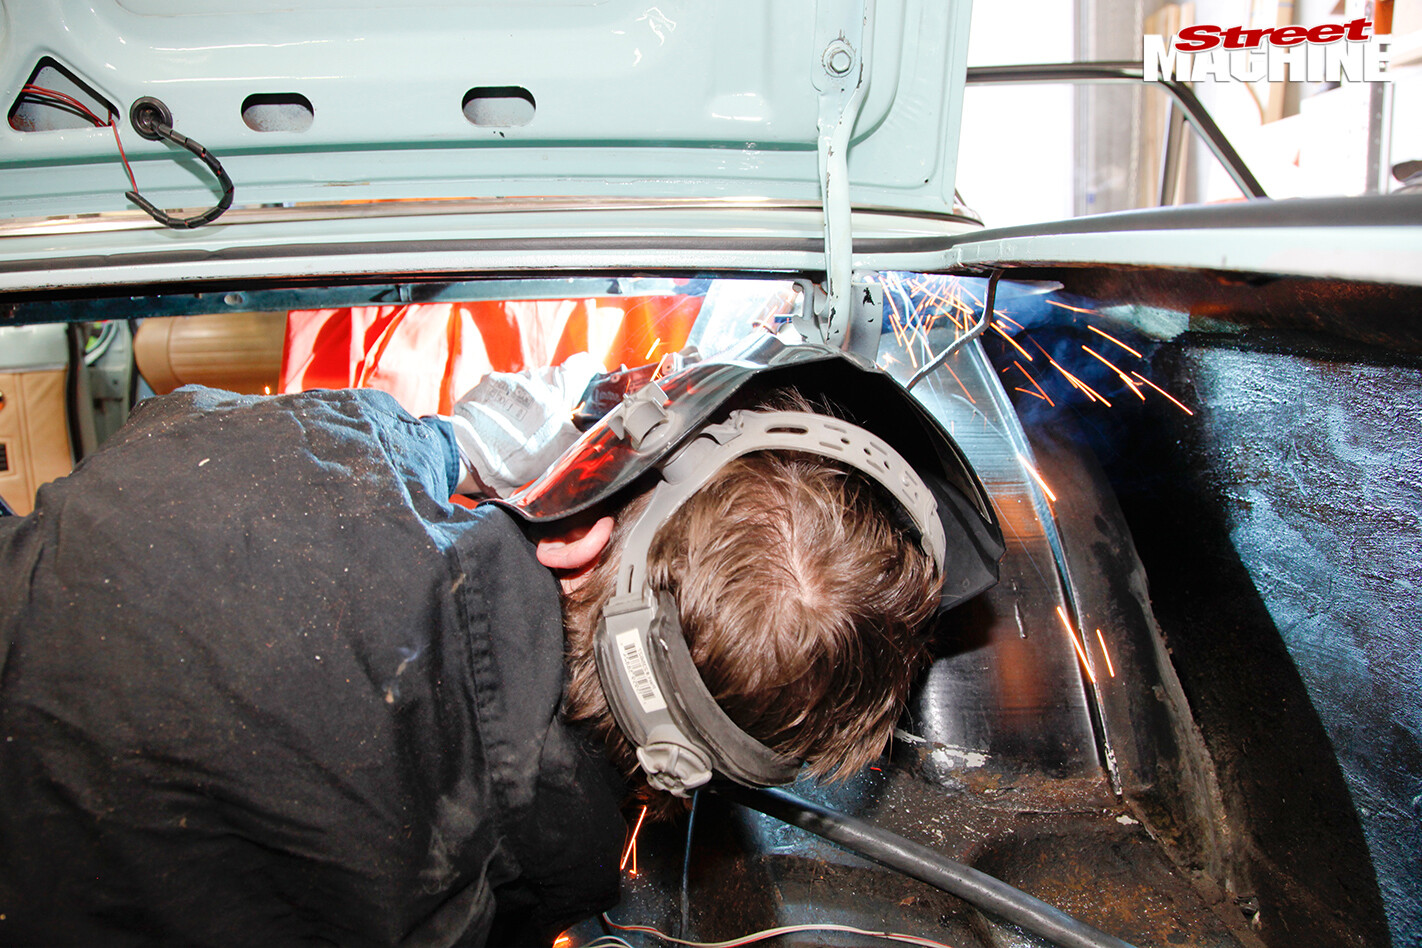 STEP 5. I could have done all the fabrication at home myself but instead I had Charisma Custom do the dirty work. To cut the slots in the metal parcel tray, a half-inch hole was drilled at either end (using a right-angle attachment on the drill), then a nibbler was used to remove the remaining material. Welding the top hats and guide rings while hanging upside-down in the boot was both uncomfortable and challenging.
 STEP 6. As with the position of the top hat, the position of the guide ring is also critical. Charisma got the positioning of both spot-on — the belt doesn’t touch anything except the vinyl on the parcel shelf. A squirt of pressure-pack black was applied to stop the dreaded rust emerging; yes, I noticed the beginnings of corrosion in some of the surrounding areas, which will need attention in the not-too-distant future.
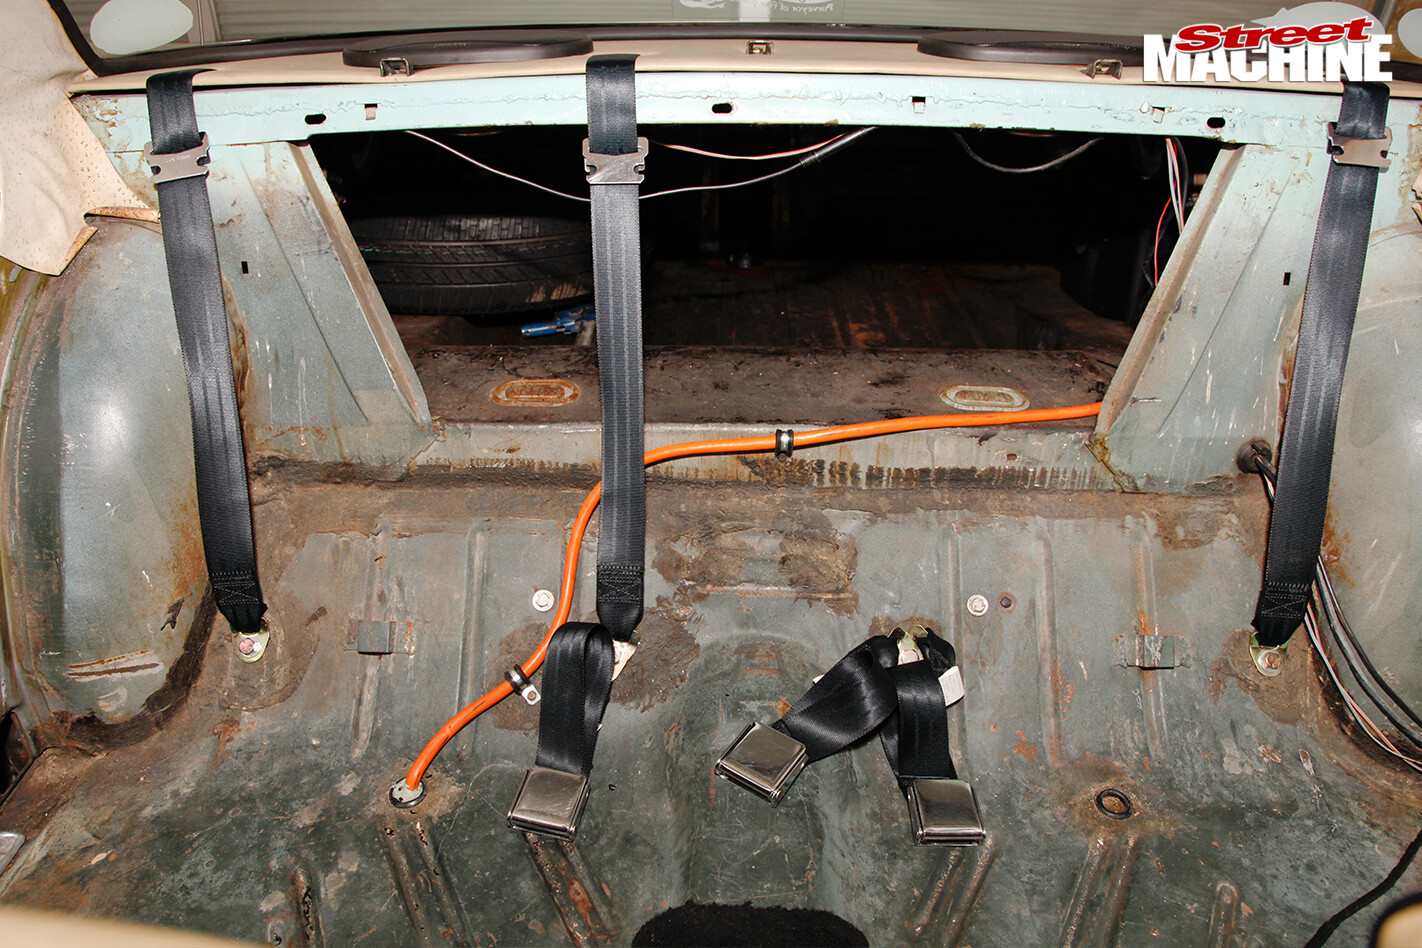
 STEP 7. So that the buckle doesn’t have to be threaded up through the parcel tray, the belt’s fed in from the top and wound onto the reel. This means the parcel tray cover needs to be fitted before bolting the reels in place.
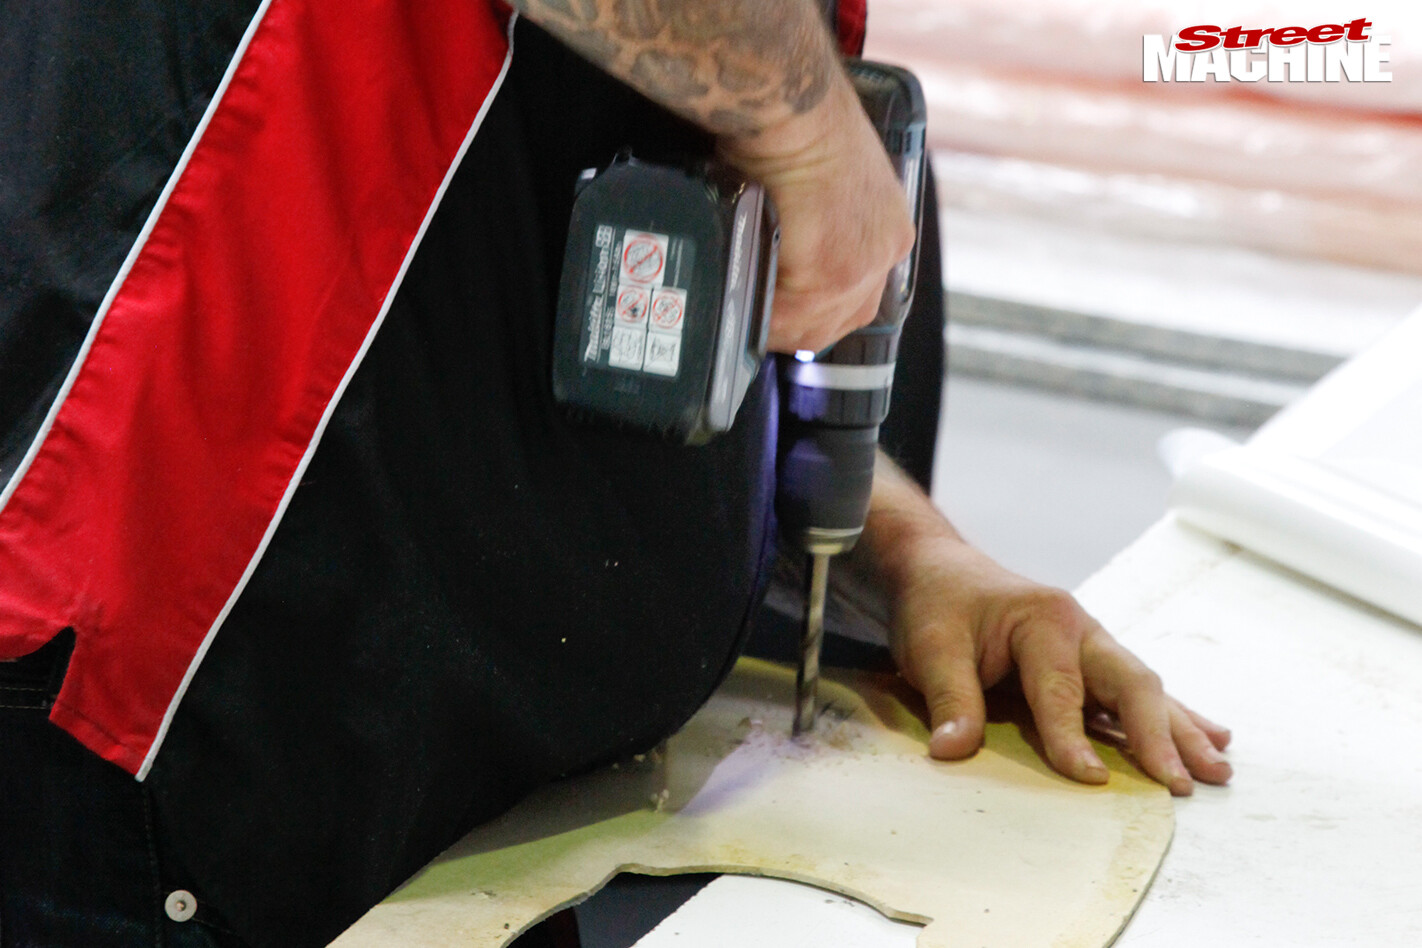 After marking the cover from underneath, a slot was carefully cut into it. Enough vinyl was left around the slot so it could wrap through the hole and be stapled underneath for a neat, professional finish.
 STEP 8. The global standard for seatbelt mounting bolts is 7/16 UNF. Seatbelt Solutions prefers to use the larger-headed versions specifically made for seatbelt installations. Aside from various lengths, there are also shouldered versions.
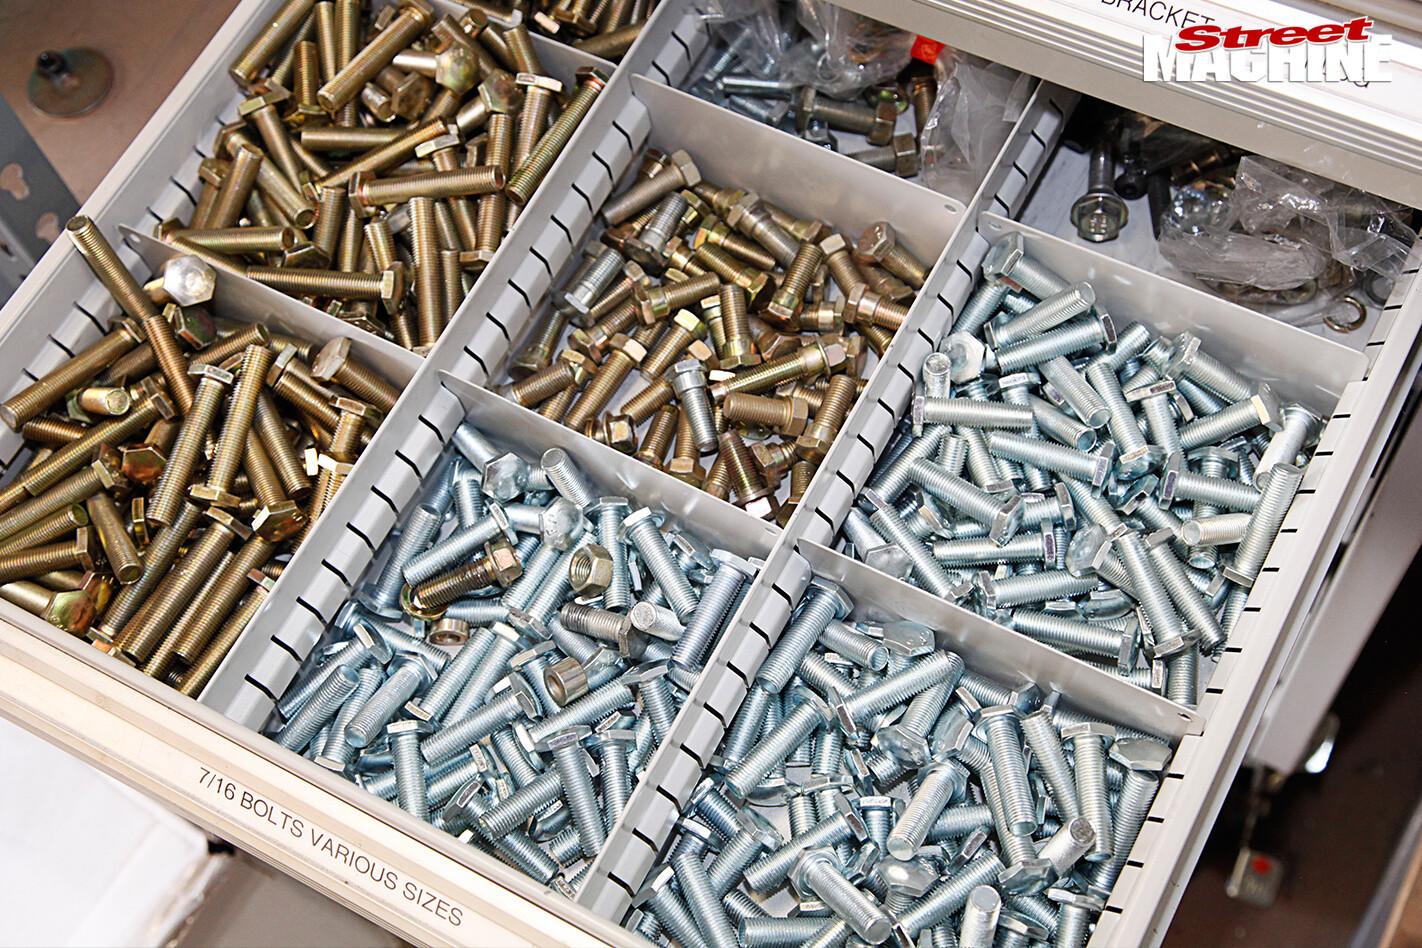 These are used where the belt mount needs to be able to swivel. Seatbelt Solutions prefers mild steel bolts to high tensile as they have more give, making them less brutal in an accident.
 STEP 9. If your car has OEM seatbelt mounts (my Rambler does) then simply bolt up the buckles and ends. If not, you’ll need to use 75x50mm reinforcing plates. The large size is to prevent them pulling through the floor in an accident — 3mm-thick plates are preferable to 6mm as they’ll deform rather than tearing through the metal.
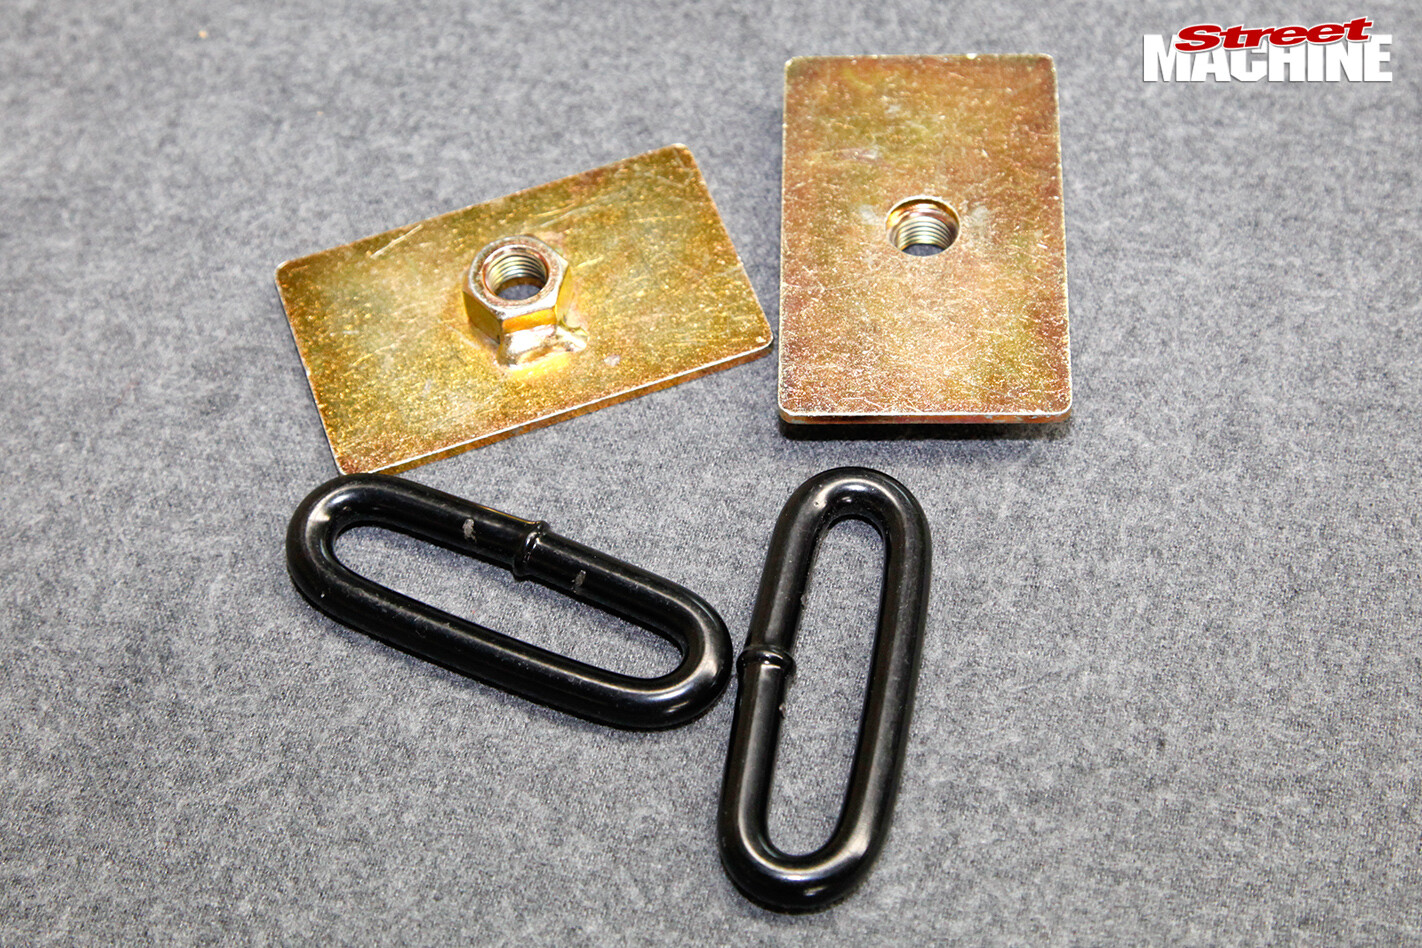 These plates must sit flush against the metal and some massaging may be required.
 STEP 10. Once everything is bottled correctly back into place, check that all the belts move freely without rubbing, snagging or binding. Check that the ELR mechanism works by giving it a swift tug and then test to see that it also fully retracts. Thsi will ensure a long service life and avoid the embarrassing situation of driving down the road with the tinkling sound of an unspooled seatbelt dragging along behind.
 OPTIONS
Seatbelt Solutions carries an array of generic modern press-button buckles and latches, along with a number of traditional versions sporting GM and Ford logos. Given that I was keen to retain a factory-style look, along with the fact that the chrome lift-latch buckles from the existing lap belts worked perfectly, I decided to retain them, which meant having them re-webbed.
Re-webbing is a common service, as one of the main reasons inertia reels play up is that the webbing gets impregnated with oil and dirt, losing its flexibility. So don’t toss those old seatbelts – there’s probably nothing wrong with them.
 As for the colour of the new webbing, you have a veritable rainbow of 14 colours to choose from. Additionally, if you’re restoring a prized muscle car of you’re after factory-correct belts, Seatbelt Solutions can supply webbing with the exact texture and colour. I chose basic black. But green, green is nice.
WRAP UP
There were two solid days of work in fabricating the mounts and getting everything right so that it functioned correctlya nd looked good. Although it was a lot more work, it is a much better solution than simply bolting the reels on top of the parcel shelf. The guys at Seatbelt Solutions and Charisma Custom were professional, a pleasure to deal with and their work was top-notch. While I don’t plan on putting it to the test any time soon, it’s nice to know that family, friends and especially the kids are a little bit safer when we’re out cruising.
Comments